
Activity 6
Foam Ball Base Coat (2 Sessions)
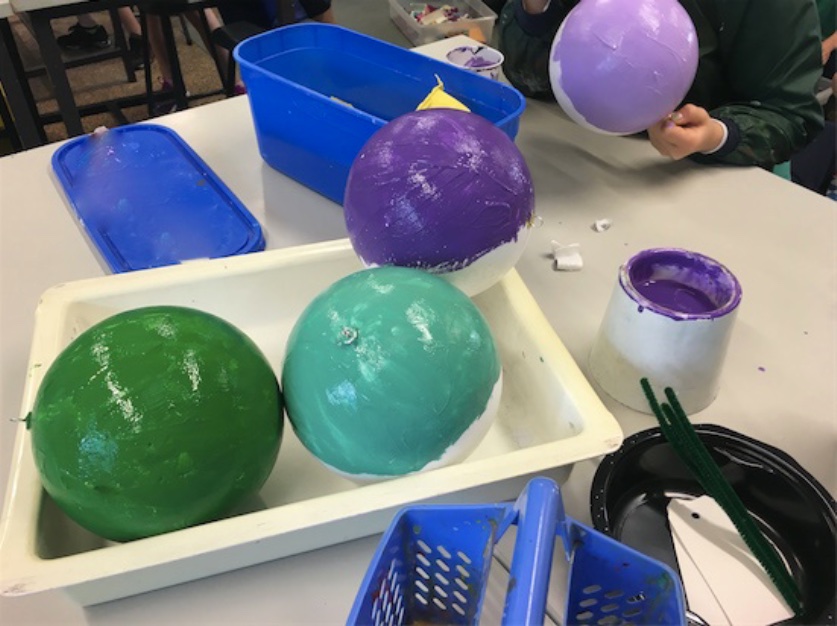
This activity paints a foam ball which will be used later as the base for the student’s artwork. This base also provides a layer of meaning, in that it shares with the viewer a colour, which represents the student artist’s family in some way.
Curriculum
Western Australian Curriculum Content Descriptions
Development of artistic processes and techniques to explore visual conventions through colour to create artwork.
Use of techniques and processes and exploration of art forms.
Australian Curriculum Version 8.3 Content Descriptions
Use materials, techniques and processes to explore visual conventions when making artworks (ACAVAM111).
Materials
Foam balls with hanging clasps inserted.
Name tags, such as thick paper rectangles with a hole created by a paper punch.
Wire or string, to attach paper tags to foam balls (short pipe-cleaners were used for this example).
Previously mixed pot of family colour paint. Paintbrushes.
Aprons.
Drying area for the foam balls.
Activity
Review previous lessons. Focus discussion on the process and students’ decisions in choosing, and maybe mixing, a colour, which represented their family.
Explain that there are two important tasks for this activity:
1. To securely label their foam ball with their name.
2. To paint their foam ball with an even coat of their family colour.
Demonstrate writing a name on the paper tags to create a name tag. Then, using string/wire/pipe-cleaner, attach to the foam ball’s hanging clasp.
Demonstrate painting the foam ball. Consider the amount of paint on the paintbrush, direction of paintbrush strokes, and quality of coverage.
Question students about the practicality of painting the entire surface space of the foam ball. Will it pose any problems with drying and storage? Discuss and agree upon solutions, according to your students’ needs. The photographed examples were created during a cold winter with a total of 90 students involved in the program. So students decided to paint two-thirds of their foam ball and allow it to dry unpainted side down in old school trays. Hence, it took two 50-minute lessons to complete Activity 6.
Remind students of their two tasks. Review how their workspace should be set up. Students start work.
Teacher Notes
Consider the size of the foam ball purchased for students to use; consider if the surface area is large enough for students’ design, and also how you will store the wet and dry painted foam balls.
Time
For this documented project, Year 4 students required one 50-minute lesson.
© This lesson plan has been created by Ana Nail and Japingka Gallery. Educational study use encouraged.
Overview | Lesson 1 | Lesson 2 | Lesson 3 | Lesson 4 | Lesson 5 | Lesson 6 | Lesson 7 | Lesson 8 | Lesson 9 | Lesson 10 | Lesson 11 | Lesson 12 | Lesson 13