
Activity 6
This activity creates leaf stencils in preparation for the bush medicine artwork collage. Students will draw leaf shapes.
Curriculum content descriptions
Western Australian Curriculum
Artistic processes and techniques to explore visual conventions when making artworks – shape, colour, space and texture.
Australian Curriculum Version 8 Content Descriptions
Use materials, techniques and processes to explore visual conventions when making artworks (ACAVAM111).
Materials
Pencils, eraser and a sharpener.
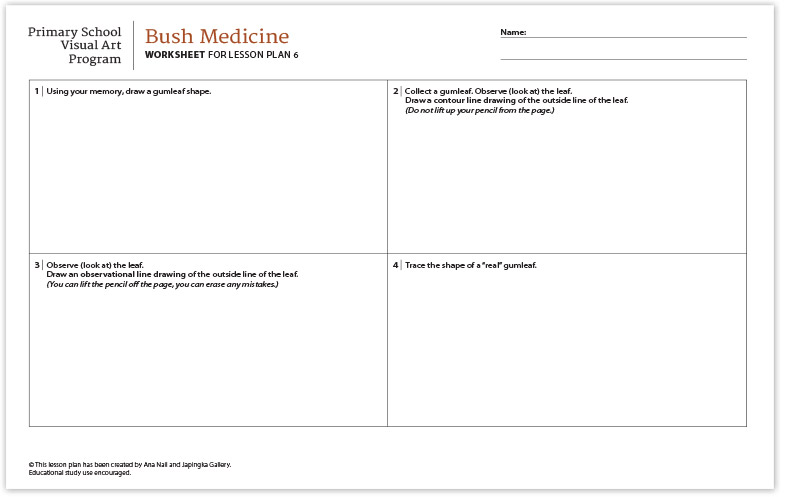
Worksheet for Lesson Plan 6.
Leaves.
Lead pencil transfer paper.
Scissors.
Activity
Review the project so far: drawing marri and Jarrah leaves, painting with green tones to create paper for our leaf collage and painting a "bush floor". Different techniques such as blending paint using different tools such as brushes, sponges, pot scourer were used to create the visual effect of the bush floor. Students discussed the artwork of artists from Utopia who painted artworks about bush medicine leaves. These artworks were of different colours and had a leaf shape repeated in a pattern.
Discuss the link between students’ art activities and the Bush Medicine artworks of Utopia.
Discuss the "influence" of artists' works on others. Recap the link between the students' developing artworks and the Utopian artworks – both being a representation of leaves. Students’ artworks are using painting and collage techniques, while Rosemary Petyarre used painting techniques only.
Explain how, during this lesson, students will create a stencil of a leaf in order to trace around for the leaf collage.
The task is to complete a worksheet where students experiment with different ways to draw the shape of a leaf to create a stencil.
Discuss worksheet. First box - from memory draw a leaf shape. Remind students to use the size of the box. If their leaf shapes are too small they will have to cut lots of leaves to fill the bush floor. Second box – students need to get a leaf from the table and do a contour drawing of the outside shape. Third box - is an observed drawing. Fourth box - is to trace around a leaf.
Remind students to draw the outside shape of the leaf – not the veins, etc. The shape will need to be one they can cut out easily and a lot of times!
Explain why the size of the leaf is important when collaging a background space, in this case, an A3 size.
Once a student has decided on which shape they will use, the student then decides how to transfer their chosen design.
Brainstorm with students the different ways they could do this.
For this example, a "lead pencil carbon paper" was used to transfer their leaf design on to thicker paper.
Demonstrate the transferring process, cutting out the stencil using scissors, and then discuss the importance of writing their name on the back of the stencil.
Students trace, cut and name their individual leaf stencils.
Teacher Notes
Check students have written their name on their cut out leaf stencils.
Time
For this documented project, Year 3 students required one 50-minute lesson.
© This lesson plan has been created by Ana Nail and Japingka Gallery. Educational study use encouraged.
Overview | Lesson 1 | Lesson 2 | Lesson 3 | Lesson 4 | Lesson 5 | Lesson 6 | Lesson 7 | Lesson 8 | Lesson 9 | Lesson 10 | Lesson 11
